
前言
Serv00的免费服务因为空间(最大3GB)有限,只适合当临时邮箱
创建Mail
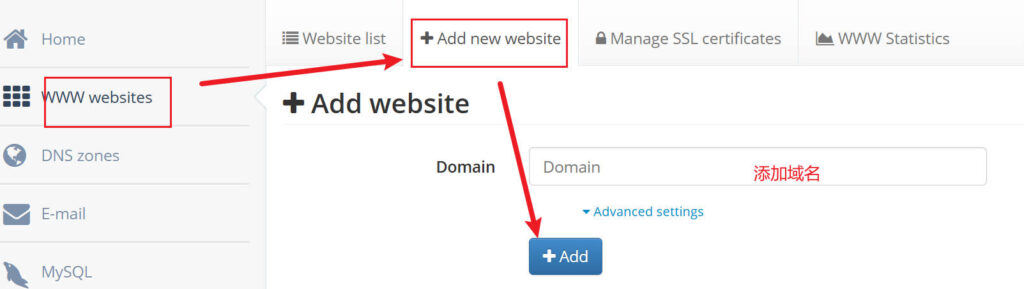
使用Serv00提供的域名
登入Serv00管理面板,按图示添加域名,格式为XXX.serv00.net,默认存在一个用户名的域名。

自定义域名
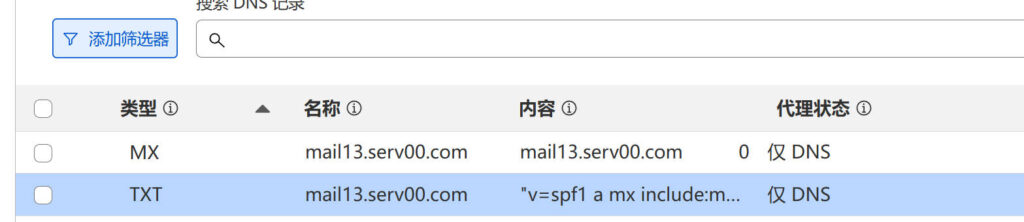
1.登陆你的域名服务商,添加2条DNS解析记录
TXT记录
v=spf1 a mx include:mailX.serv00.com -all
MX记录
mailX.serv00.com
注意:此处的 mailX 中的 X 以注册成功后serv00发送的电子邮件为准,如收到邮件为:
SMTP address:	mail3.serv00.com (ports: 25, 465 and 587)
IMAP address:	mail3.serv00.com (ports: 143 and 993)
POP3 address:	mail3.serv00.com (ports: 110 and 995)
则X为13
2.在mail中添加自定义域名
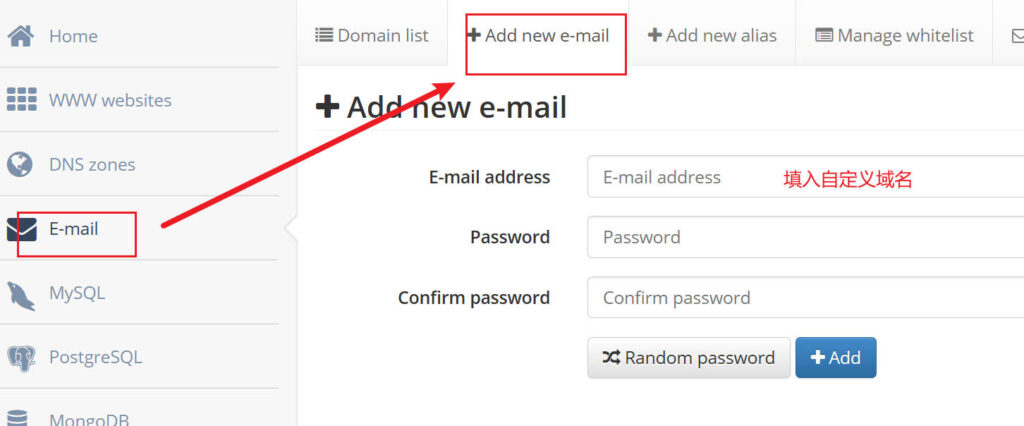
注意:邮件地址格式为XXX@自定义域名,密码需要大小写+数字
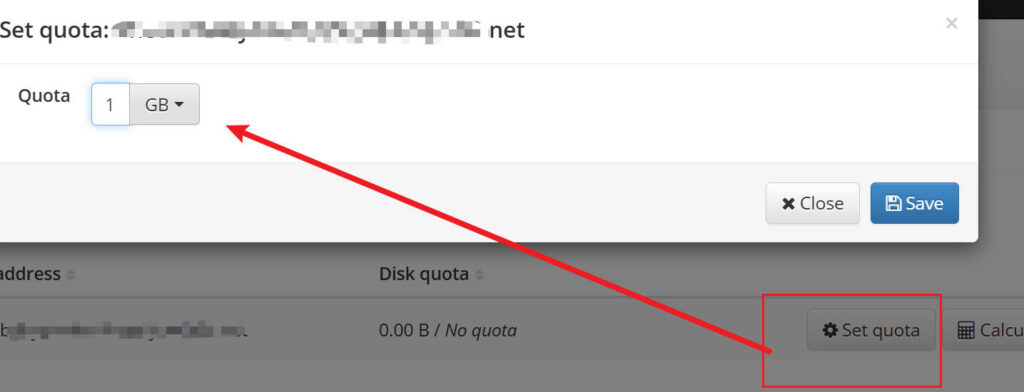
3.更改邮箱空间

在detail里选择set quota,空间最大只有3GB,按需调整
4.登陆邮箱
右上角点击open web client,输入你的邮箱地址、密码,登陆成功则配置正确,失败请检查DNS解析

编辑STMP服务
在需要设置 SMTP 的项目中填写如下选项
此处的 mailX.serv00.com 依然和上述相同
| 邮局服务器地址 | mailX.serv00.com |
|---|---|
| 邮局服务器端口 | 587 |
| 邮局用户名 | mail.serv00.com #登录成功的用户名 |
| 邮局密码 | mail.serv00.com #登录成功的密码 |
发布者:木木,转载请注明出处:https://blog.mmcool.site/5969.html
 微信
微信  支付宝
支付宝